Leixen VV-898 Pinout and Programming
The Leixen VV-898 is a small, dual-band, 10W capable radio intended for mobile/portable use on 2m and 70cm.
Mine cost £79.95 including delivery and VAT from Martin Lynch & Sons, which at the time I bought it was even cheaper than eBay China.
You can program this radio through its menu, but some functions are limited to programming via the Factory Software or CHIRP. Firmware cannot be upgraded.
Unless you know what you're doing, you should buy a programming cable from your radio dealer and use Windows and CHIRP to program the memories of this radio.
I don't use Windows, and do a lot of microcontroller programming via USB to TTL. If that sounds familiar, the rest of this page is for you.
Microphone connector pinout
The photo below shows the connector on the end of the supplied microphone (left) and a standard ethernet patch cable wired to T568B (right). I've used T568B colour coding for my homemade cable below.
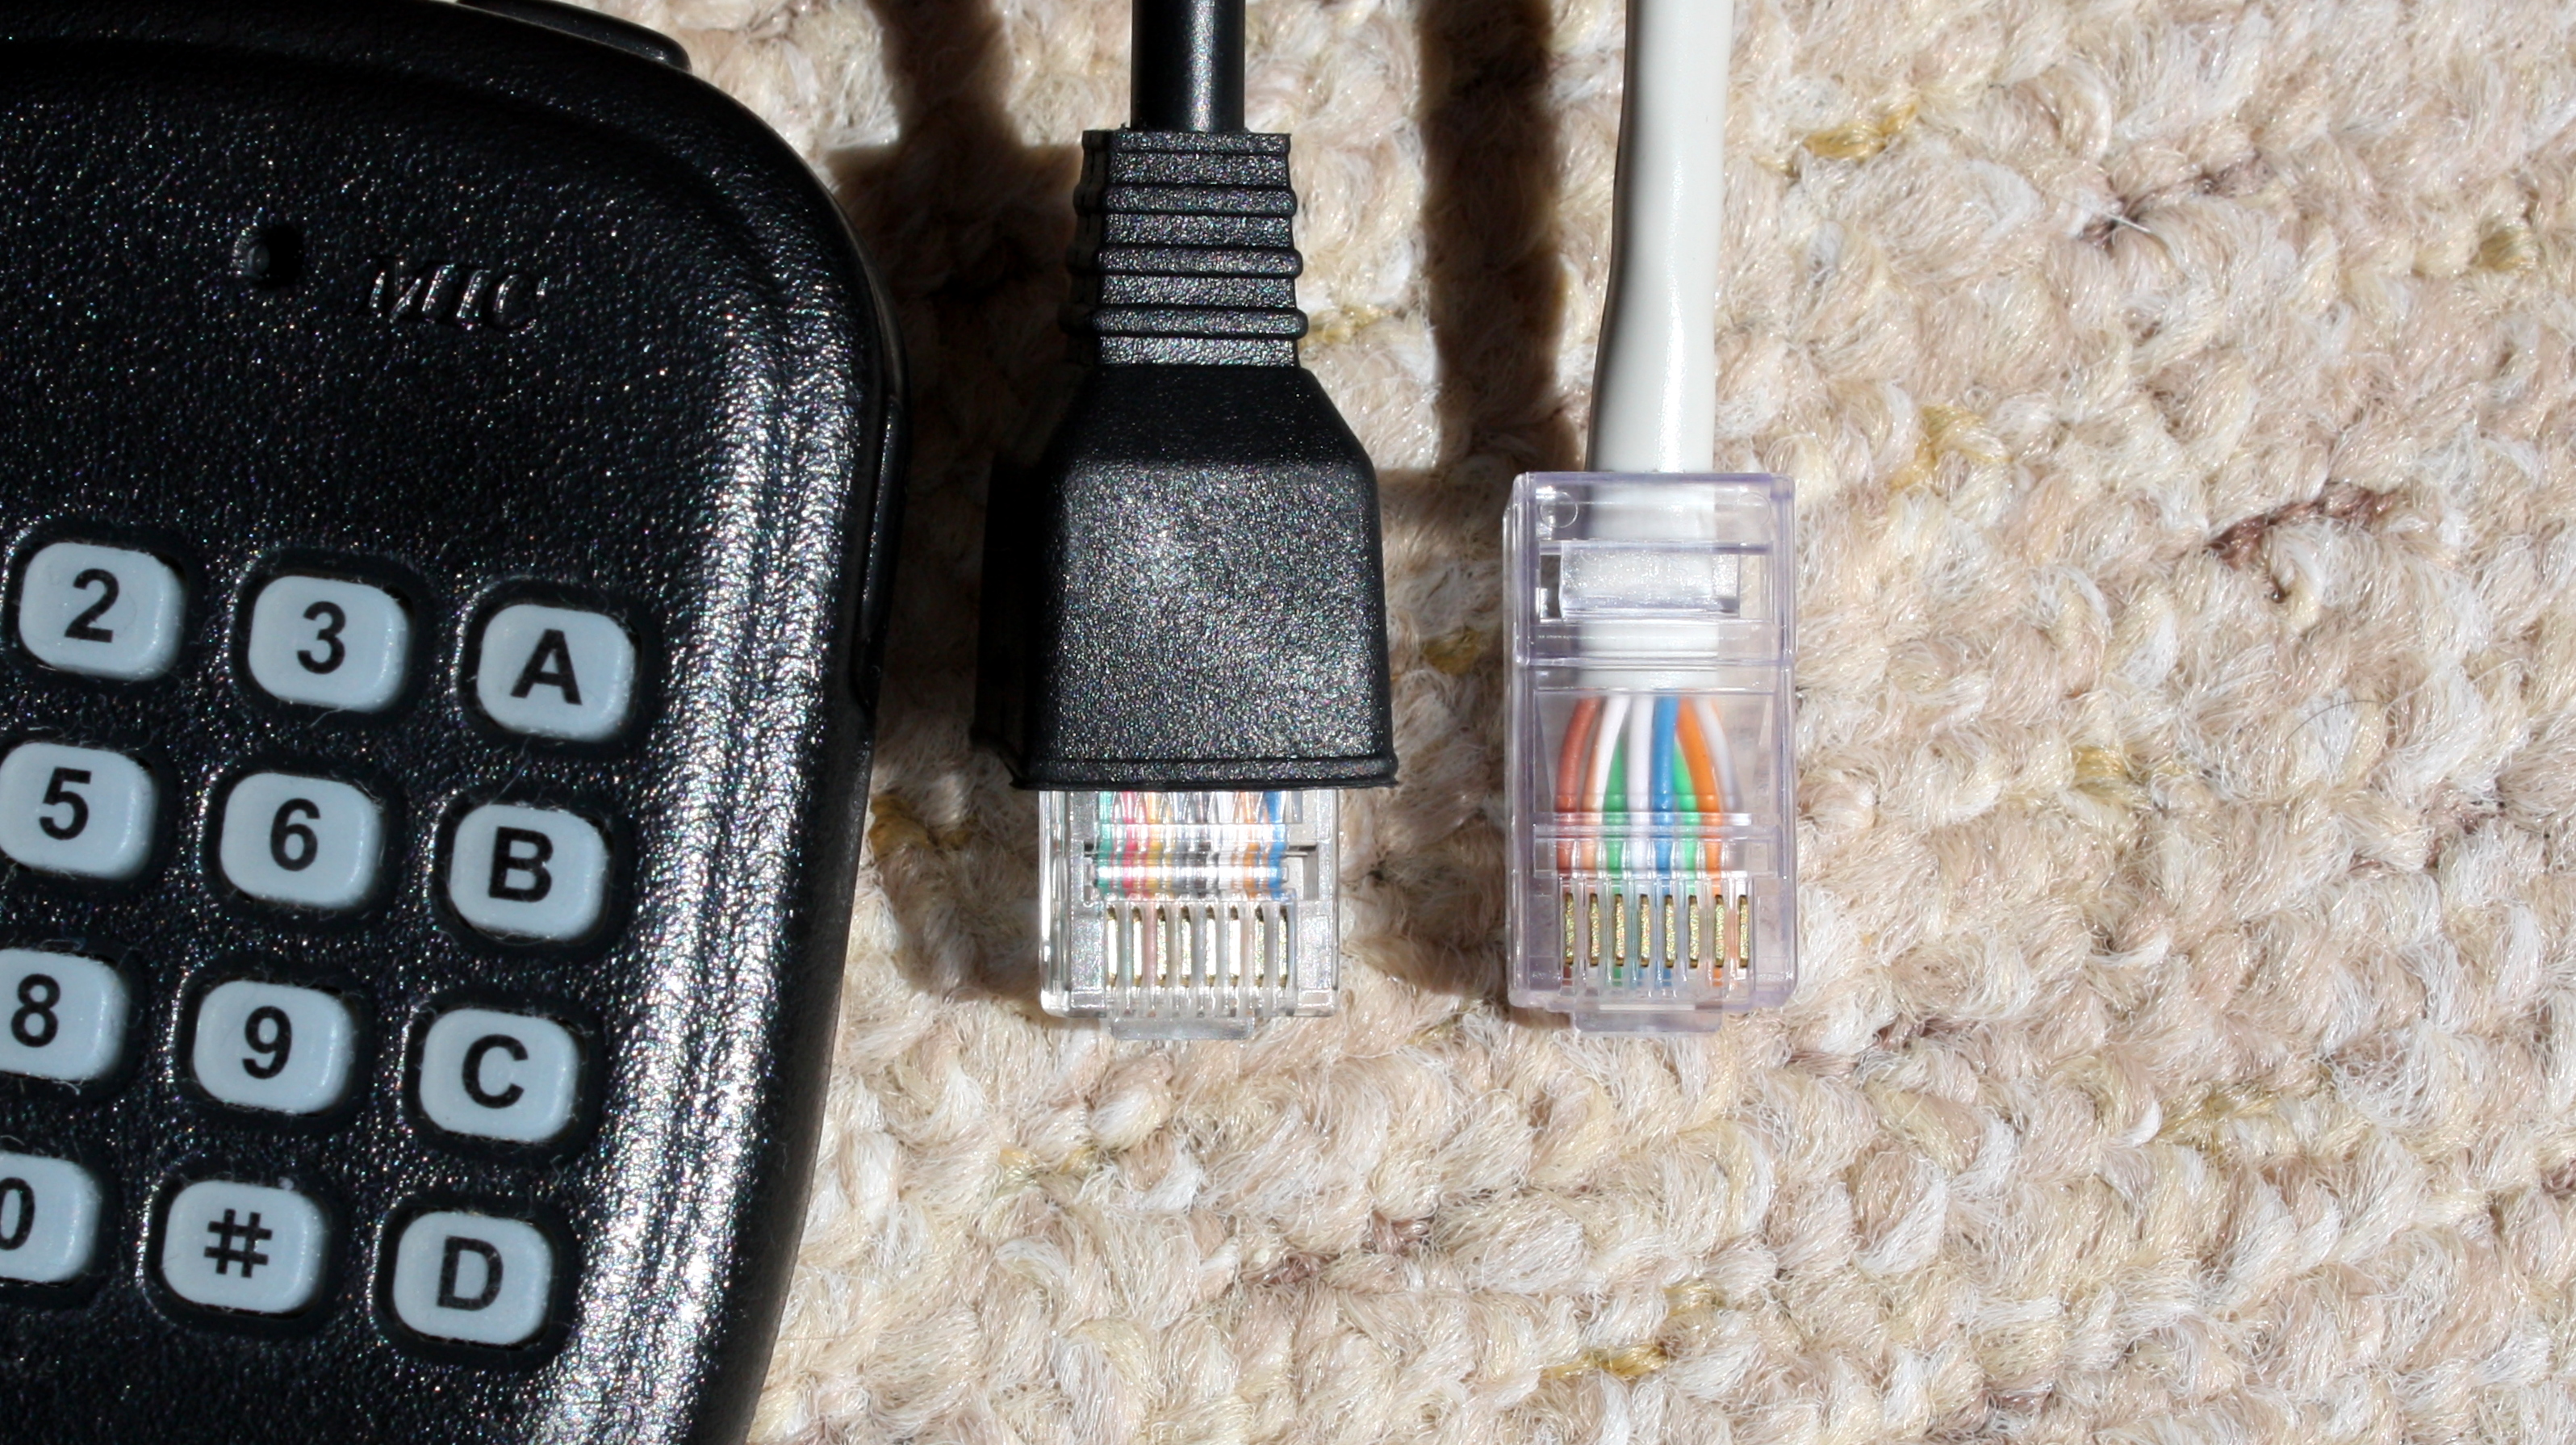
On the patch cable, the left hand pin is dark brown and the right hand striped orange. The following table numbers pins left to right as per the photo (retaining clip down).
| Pin 1 | Pin 2 | Pin 3 | Pin 4 | Pin 5 | Pin 6 | Pin 7 | Pin 8 | |
|---|---|---|---|---|---|---|---|---|
| Audio | NC | VCC | GND | PTT | MIC- | MIC+ | RX | Key |
| Data | NC | NC | GND | TXD | NC | NC | RXD | NC |
Only three pins are needed to make a programming cable (3 — GND, 4 — TXD from the radio to RXD on your serial interface, 7 — RXD to the radio from TXD on your serial interface).
VCC is 8V, the TXD and RXD pins appear to be TTL (5V).
You don't need to connect a reset line, the radio enters the programming mode via a data command.
Connecting to your own serial interface
I use an Apple Macbook with OSX, and the various knock-off USB to TTL cables don't work well for me. For that reason, I use an FTDI Friend when programming radios, Arduinos and the like. If you have driver compatibility problems with cheap cables, there's a good chance a genuine FTDI chip will work flawlessly.
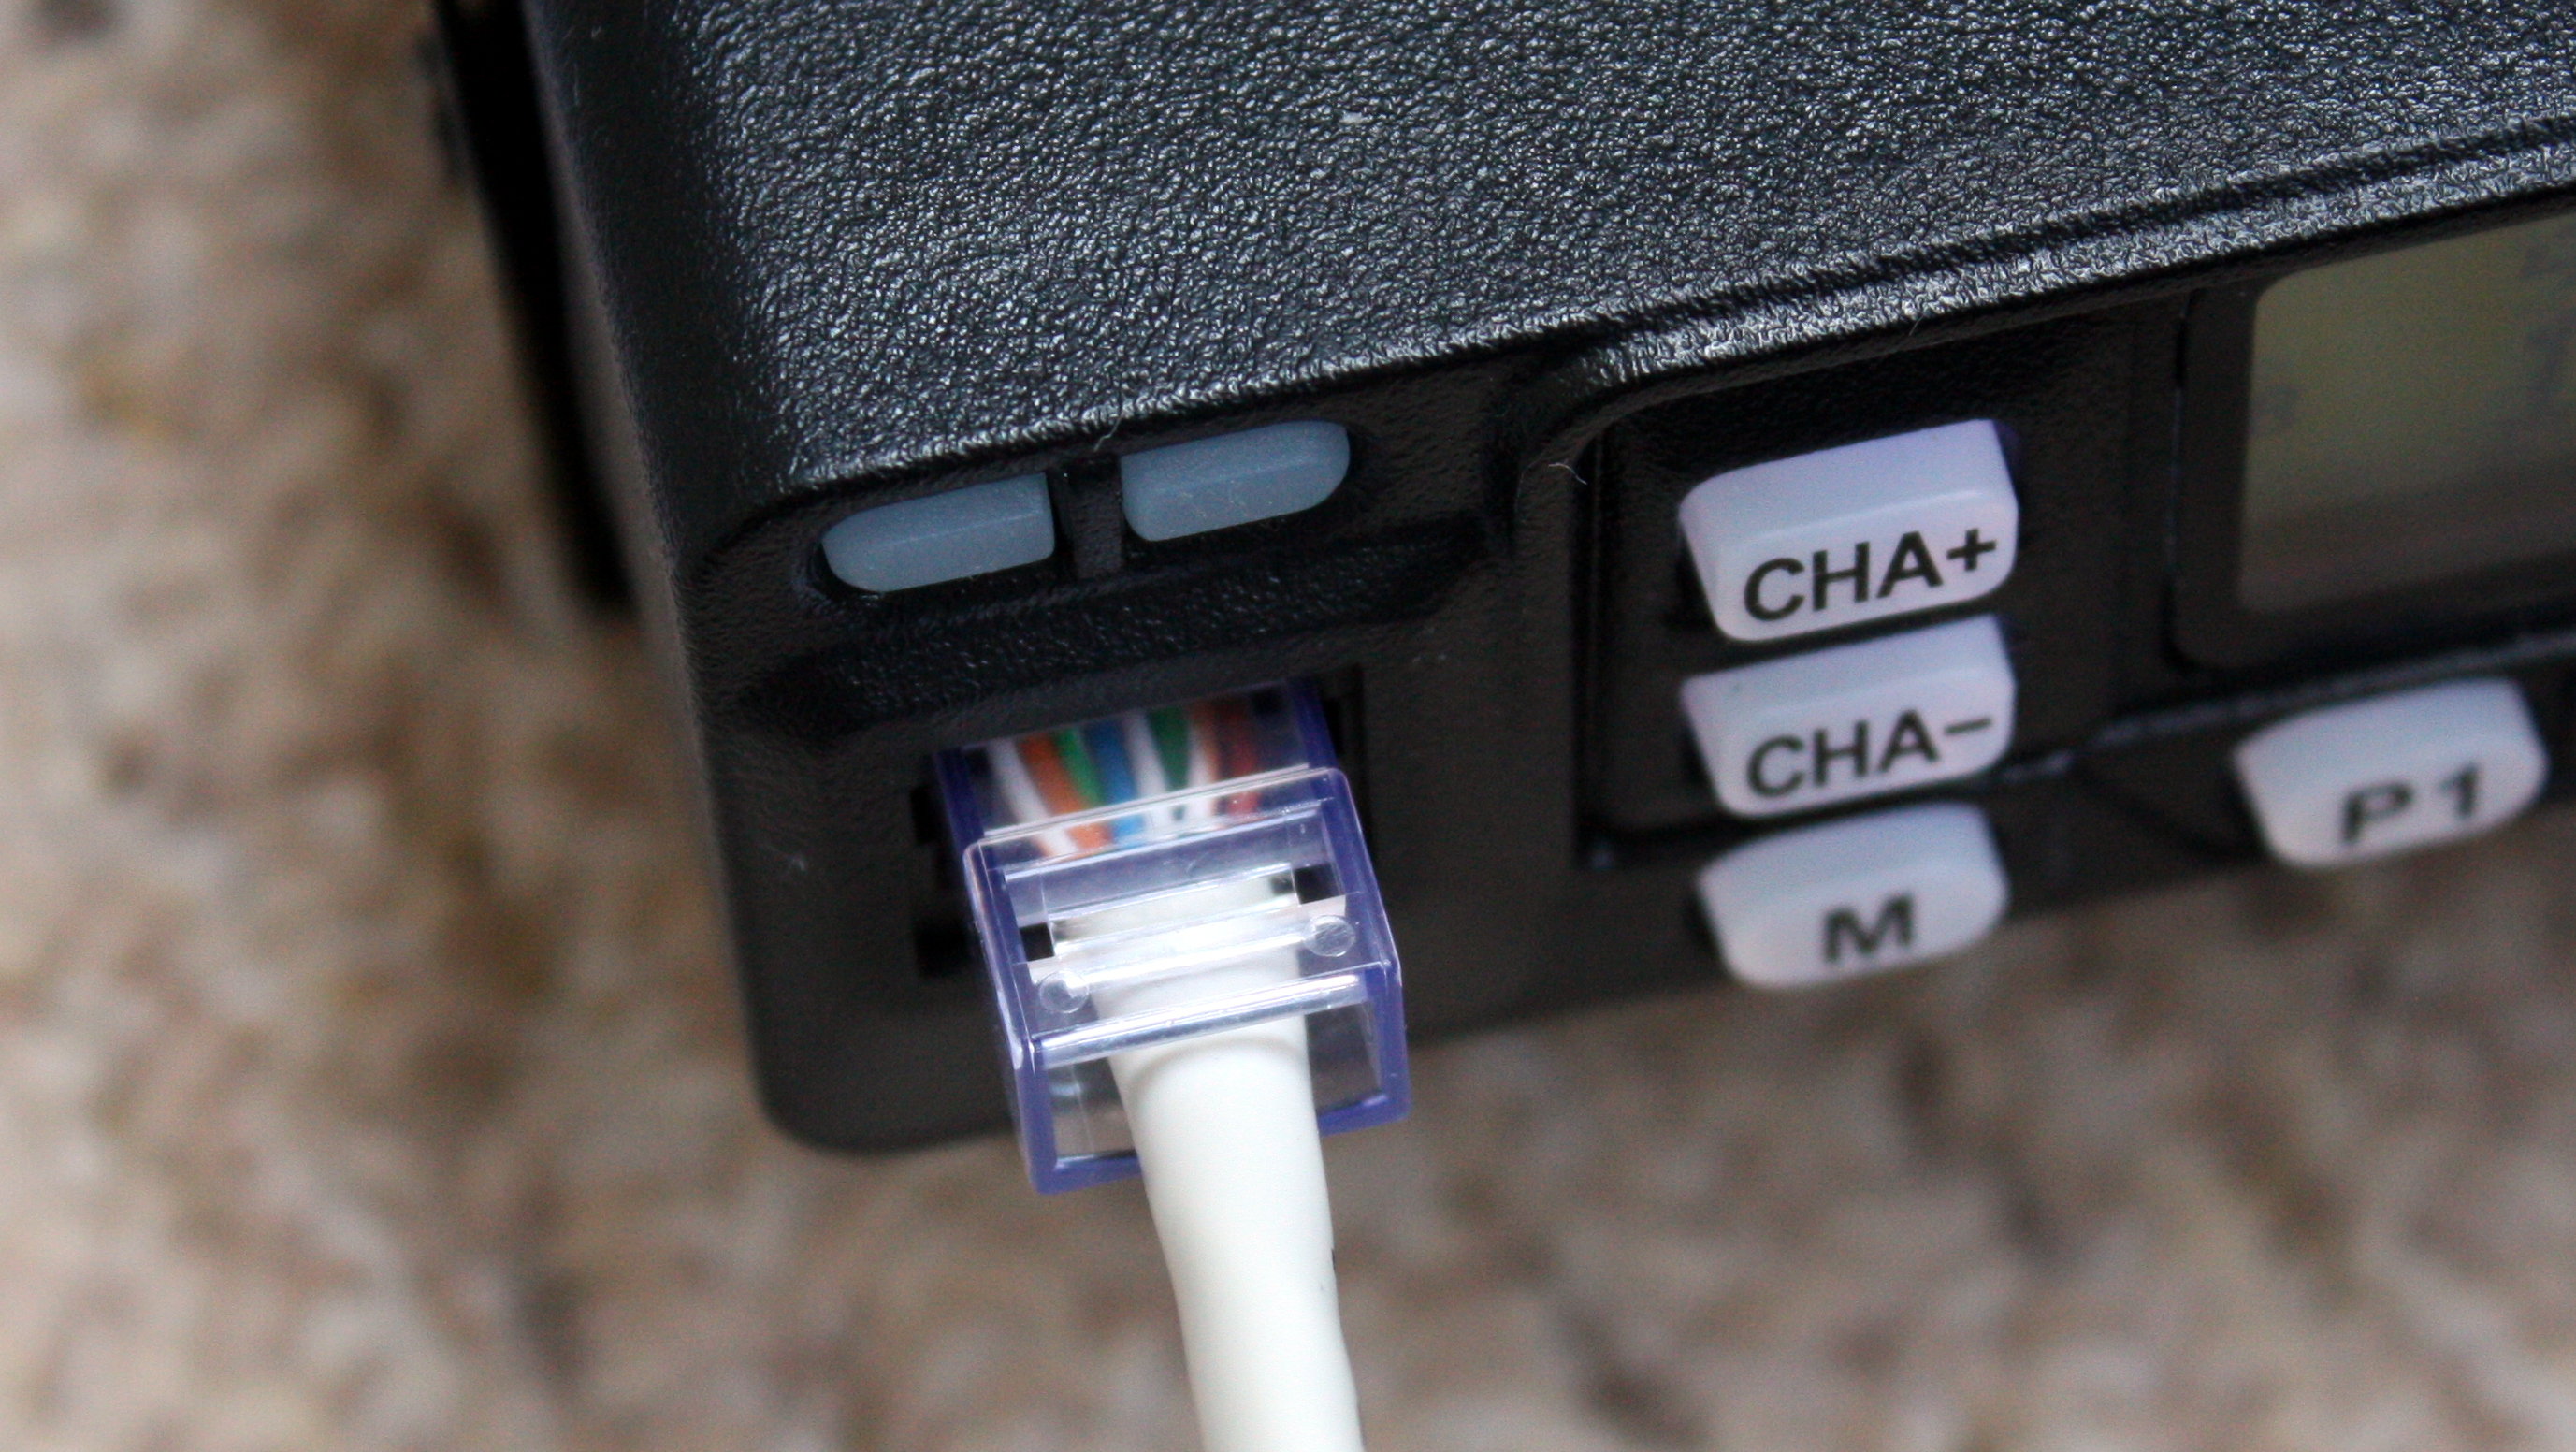
Here's a photo showing my setup. The Leixen VV-898 is powered via a leisure battery and connected to my homemade 2m Slim Jim.
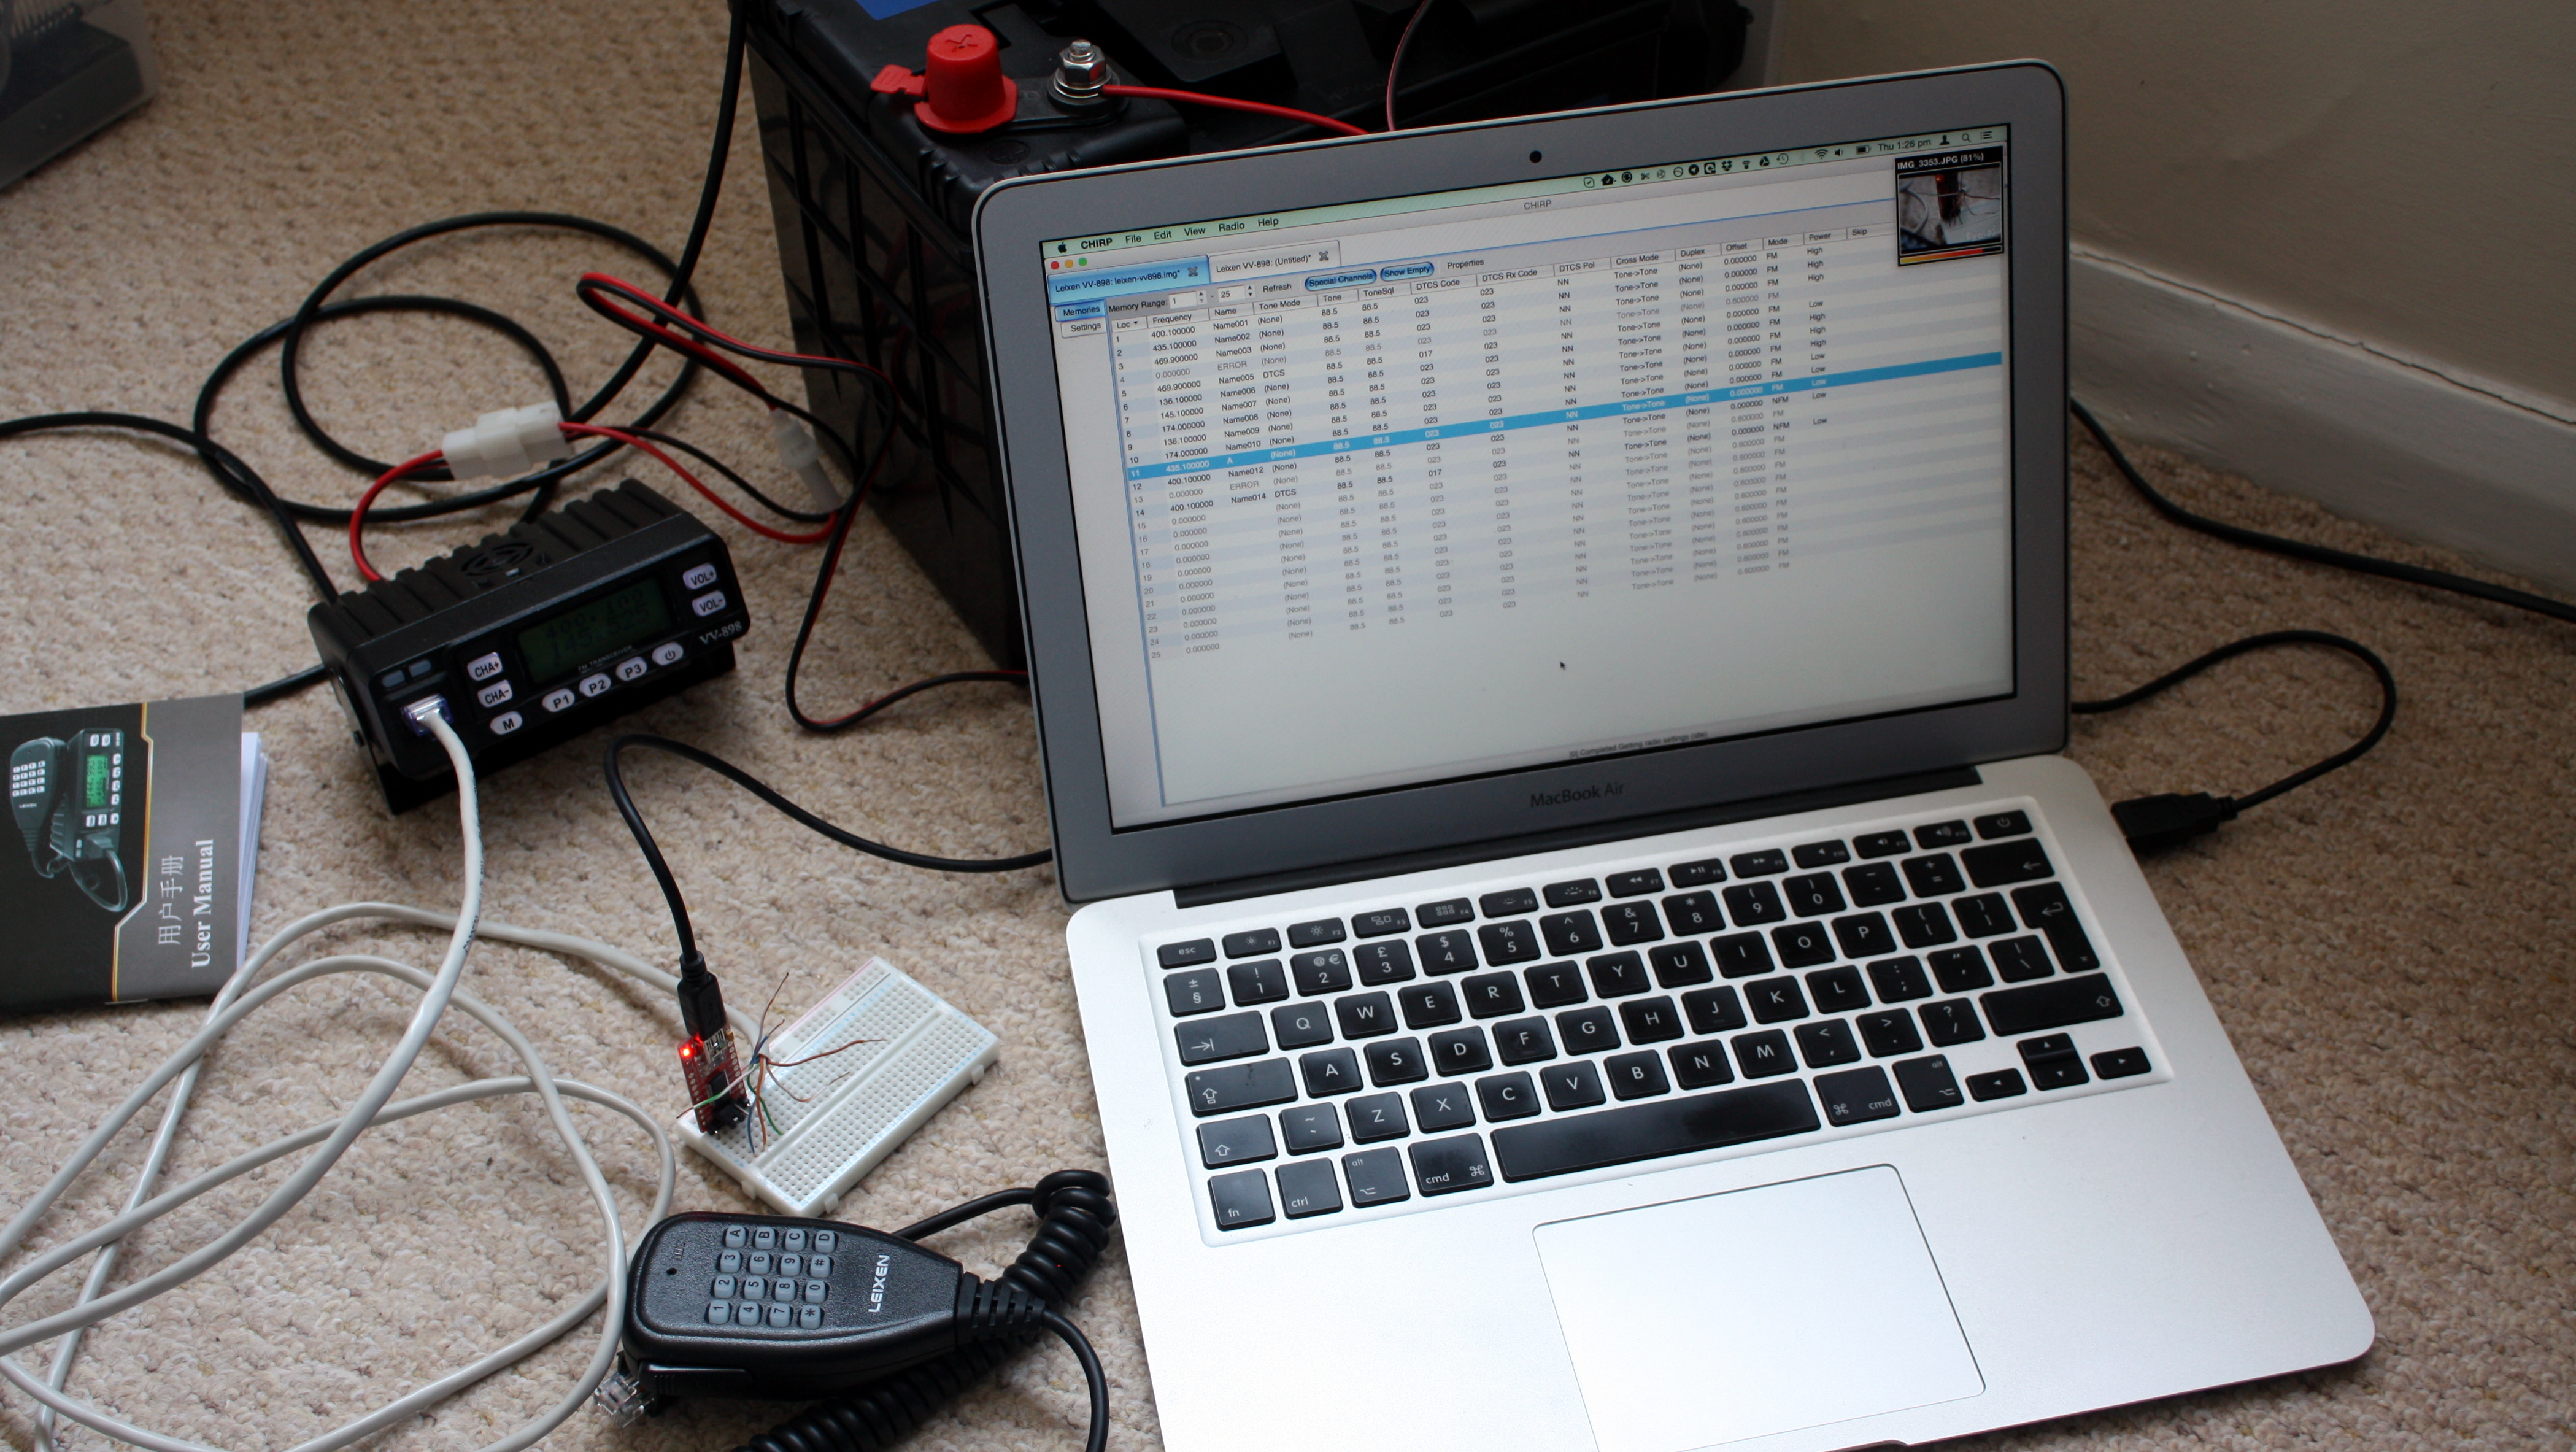
I've replaced the microphone with a standard ethernet patch cable plugged into the radio. If you're also using a network cable cut in half, you can use the same colours.
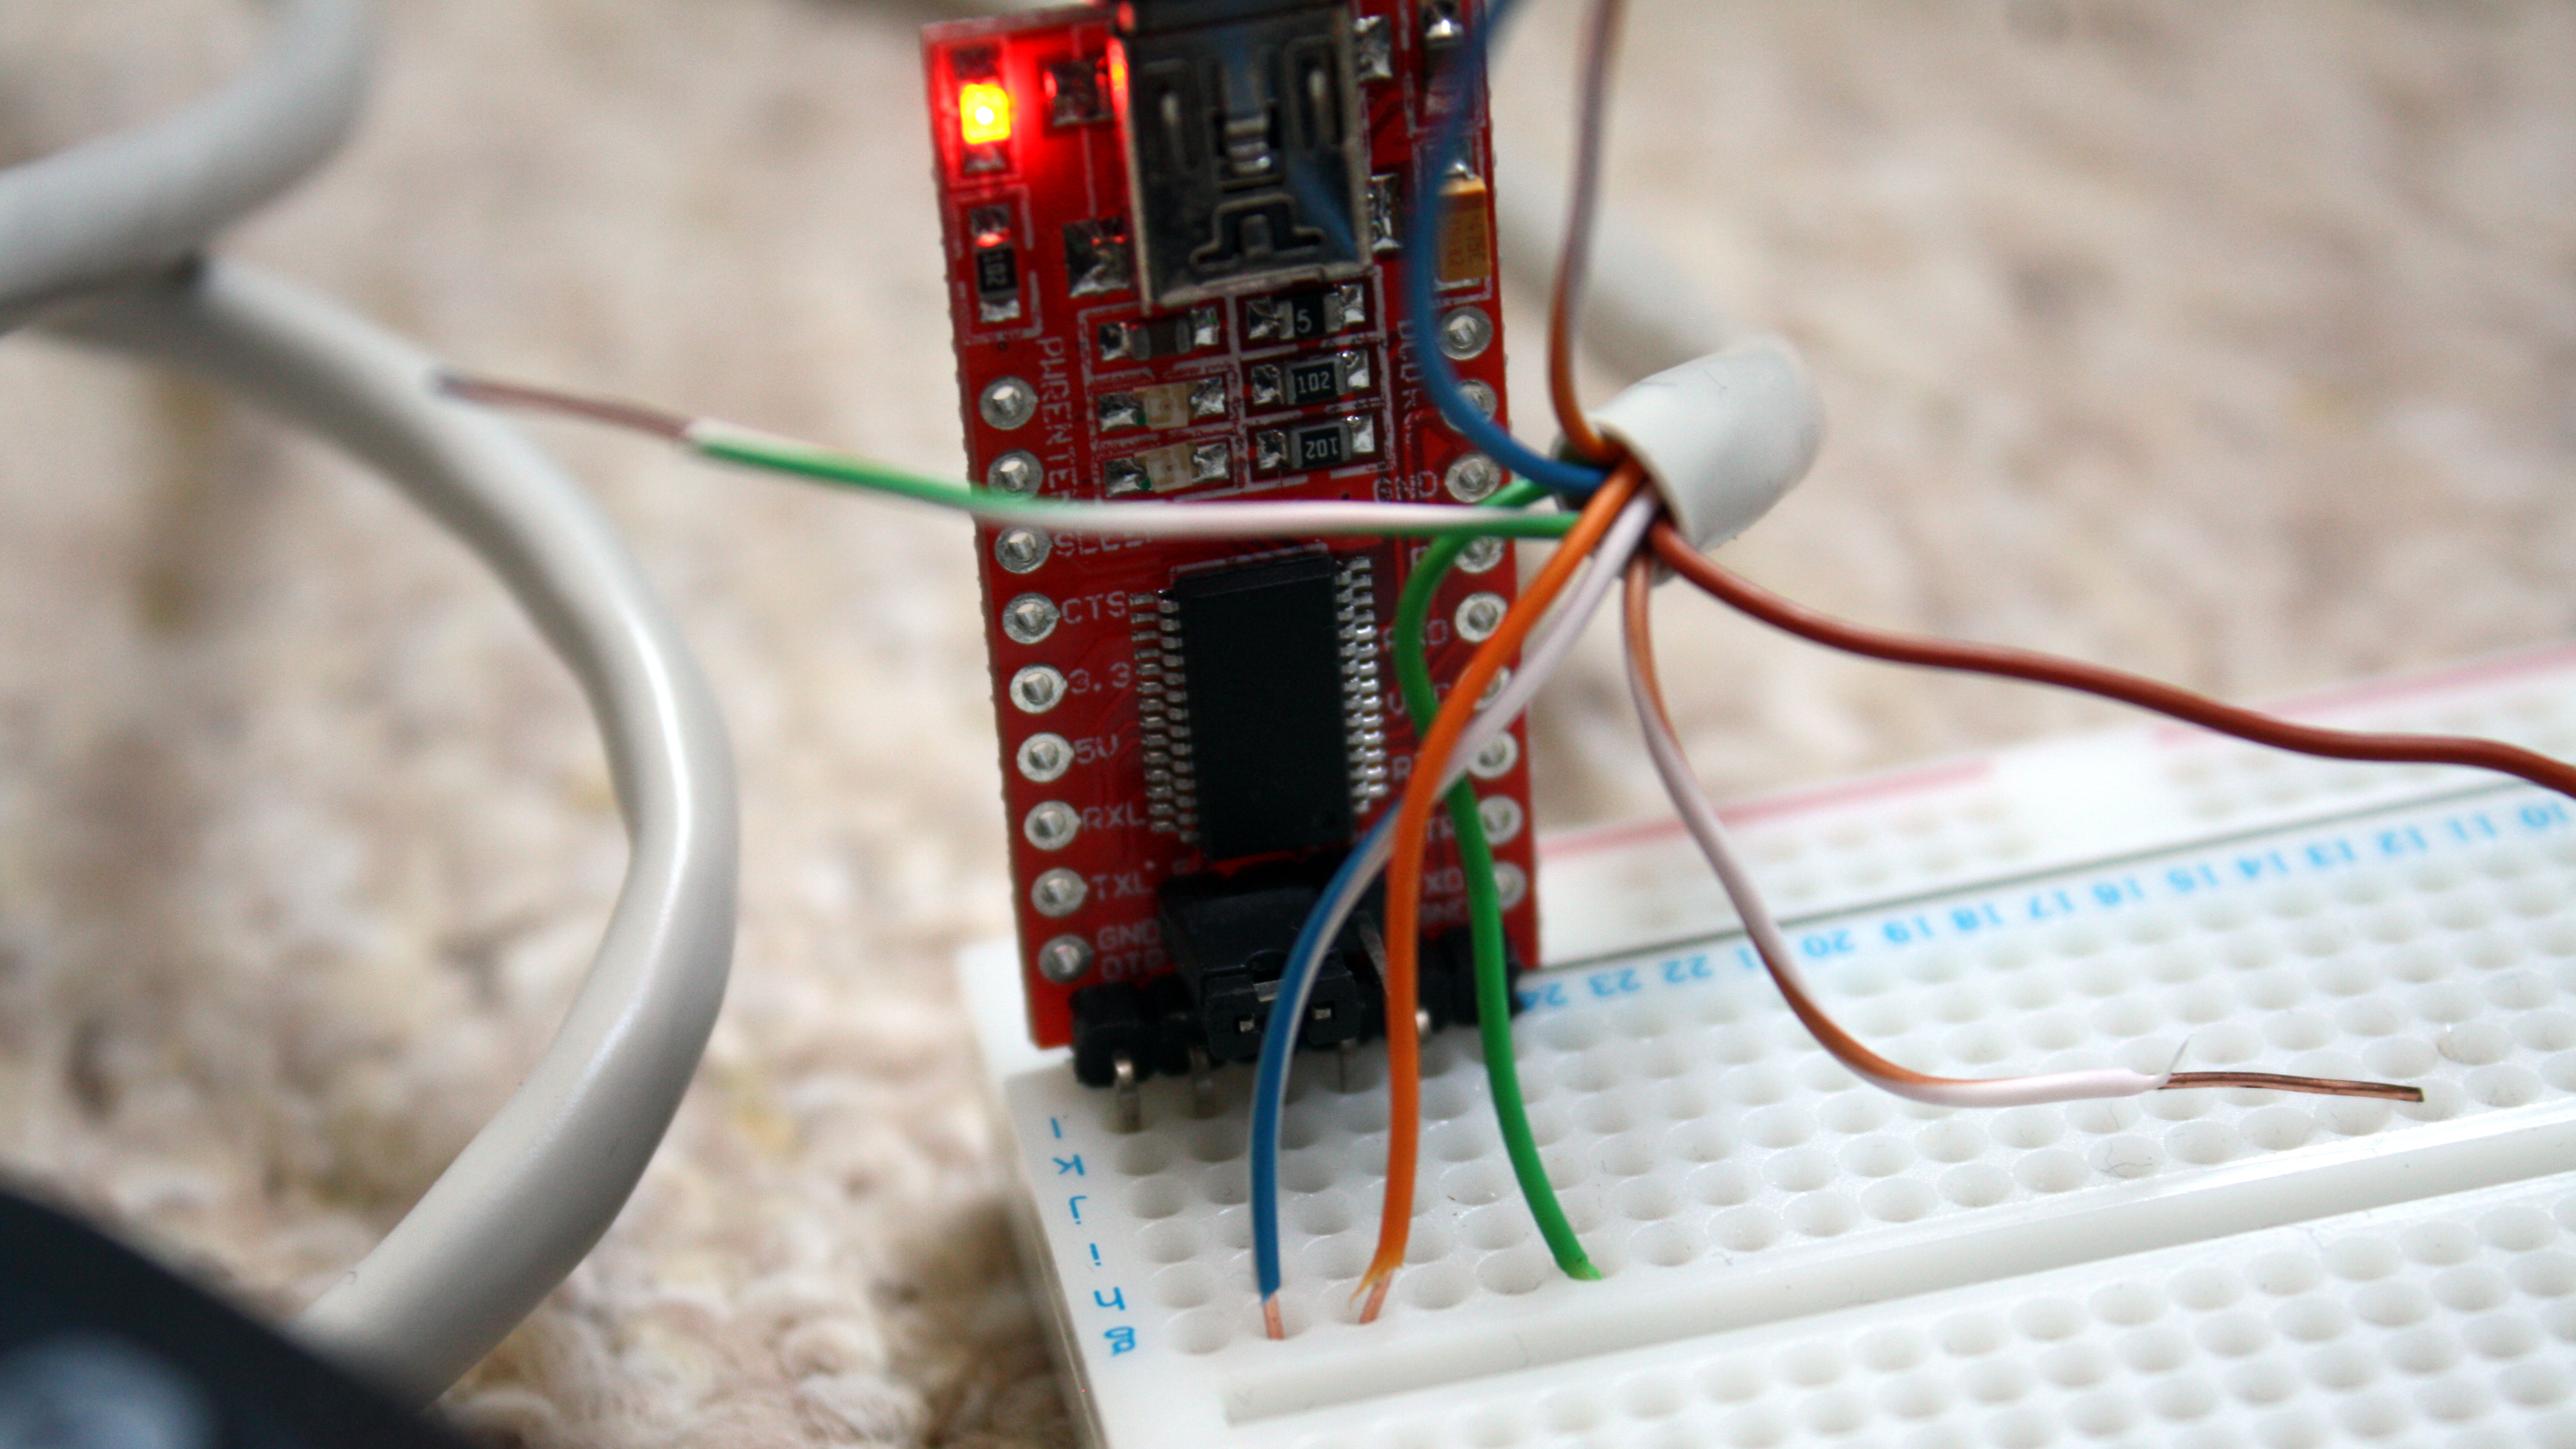
The other end of the cable breaks out the three pins necessary for programming. Here's how to connect these to your FTDI Friend (or other USB to TTL interface):
| Pin 3 | Pin 4 | Pin 7 | |
|---|---|---|---|
| T568B Colour | Dark Green | Striped Blue | Dark Orange |
| Signal | GND | TXD | RXD |
| Connect to | GND | RXD | TXD |
Programming with CHIRP
You'll need a recent daily build of CHIRP to program this radio. If you've made it this far, you'll be able to pick up programming the memories without any tutorial.
- Connect everything up, and power on
- Launch CHIRP, select 'Download From Radio' from the Radio menu
- Radio should display 'Waiting…', transfer settings to CHIRP and beep when done
- Make your changes
- Select 'Upload To Radio' from the Radio menu
Right clicking a memory and selecting Properties will give you access to some of the advanced features (like compression and per-memory VOX).
This radio has a per-memory audio scrambler built in. Be sure to disable it on the amateur bands.